


Опубликовано 2010-02-04 11:18:36 автором Ruslan
"Hello World" on the microcontroller in iron
In the previous lesson we did hello worl emulator Proteusand in this tutorial we will do everything in iron. To repeat this lesson we will need a
- Programmer - a device by which we will record our software into the microcontroller
- Microcontroller atmega8
- resistor of 100 to 500 ohms. If you really want, and resistor nope, can be without it (at your own risk, you can burn leg MK)
- Led any low-powered
the Scheme is very simple: the atmega8 microcontroller, the R1 resistor 100 Ohm up to 500 Ohm, led any. All this connect as shown in the diagram below:

Next, we need to write a simple program that will change the status of some legs MK. The program will create the environment CodeVisioAVR. After startup, the environment, click File->New Project further click OK. Further expose all as shown on the screenshot
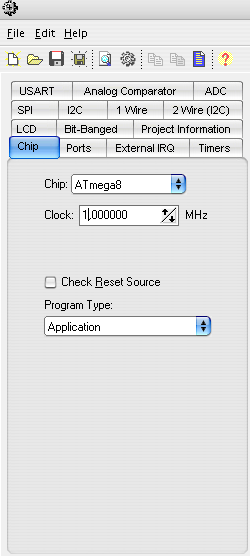 Next press File->Generate, Save and exit and give the name of the new project
Delete all of the code and paste in the following
void main(void)
{
PORTD is set=0x00; //Set all outputs port D is 0 (turn off the whole port D
DDRD=0xFF; //Make port D as output to the port outputs a voltage of 5V
while (1) //Organize an infinite loop
{
PORTD.0=1; //Switch the led on 0 the output port D
delay_ms(500); //Make the latency of 500 milliseconds
PORTD.0=0; //Disable the led on 0 the output port D
delay_ms(500); //Make the latency of 500 milliseconds
};
}
Now we need to connect the programmer to the microcontroller (simple programmer can gather on this patternor штото more solid.
Fill firmware into the microcontroller
After we connected a programmer, I used avr910 usb, the system should detect it. And he appears in device Manager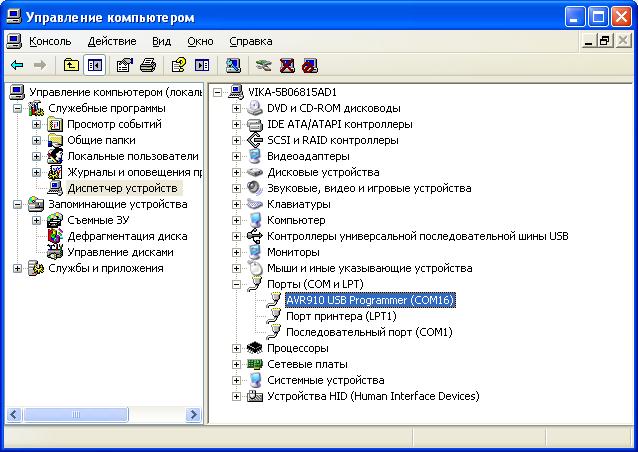 From the screenshot, we see that he sits on port COM16. Now we need to specify the type of the programmer, and the port on which he sits in CodeVisionAVR. After running CodeVisionAVR click Settings->Programmer, we have this window
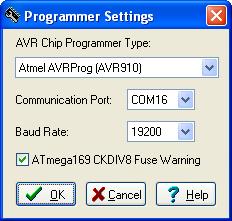 Set its port and the programmer type and click OK. Everything is now
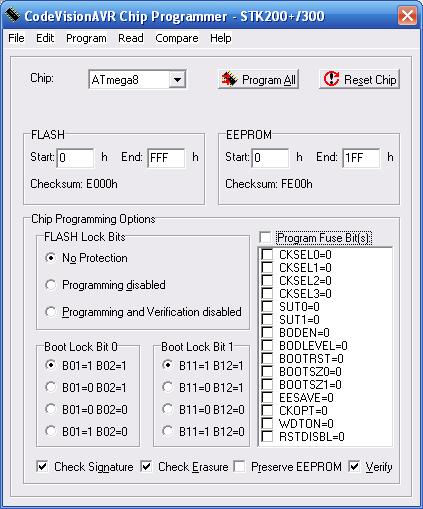
burn the firmware. To do this, select Tools -> Chip Programer
putting all as shown on the screenshot:
Set its port and the programmer type and click OK. Everything is now
burn the firmware. To do this, select Tools -> Chip Programer
putting all as shown on the screenshot:
 авторизоваться.